Adding an Identity Store and Assigning Access to a Tenant - Part 3
In my previous post, I covered the creation of a tenant using the CloudClient but before you can authenticate to the tenant you need to first assign the Identity Store that you want to use for assigning access rights, then you need to assign access for the two tenant roles 'Tenant Admin' and 'Infrastructure Admin'.
Adding an Identity Store
- Launch the CloudClient and authenticate to the vRealize Automation system. (Refer to my previous article here).
- Enter the following command-line syntax to add an Identity Store to a tenant.

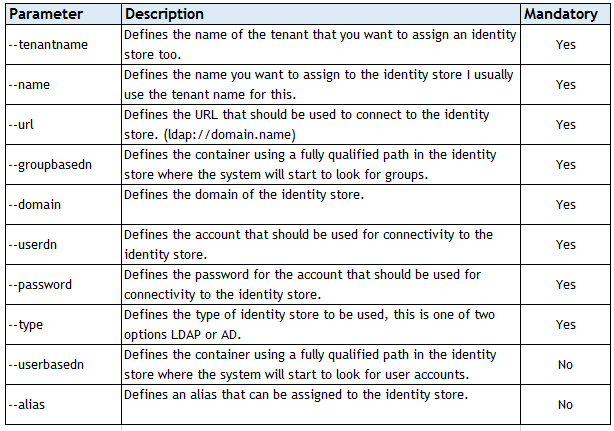
In this example we used the 'vra tenant identitystore add' command. For easy reference here are the parameters explained.
Assigning access to a Tenant
Enter the following command-line syntax to assign access to the 'Tenant Admin' role of a tenant.

Enter the following command-line syntax to assign access to the 'Infrastructure Admin' role of a tenant.

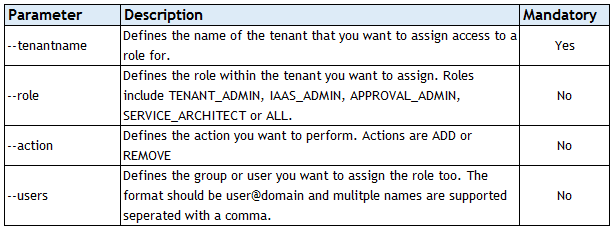
In this example we used the 'vra tenant admin update' command. For easy reference here are the parameters explained.
NOTE
With the release of v3.x of CloudClient some of the old command-line syntax associated with the 'vra tenant admin update' command have been deprecated. See the official documentation for further details.