Updating a vSAN License in VMware Cloud Foundation
Ever been in the situation where your licenses assigned in VMware Cloud Foundation are due to expire, well whilst doing some work this week in the lab I noticed that some of mine were coming up for expiration, which got me wondering what the process was to remedy. If you have been in this situation, you probably like me started by checking out the License Management section of the VMware Cloud Foundation Administration Guide and like me ended up being disappointed to find that it only covers the following topics:
- Adding a License Key
- Editing a License Key Description
- Removing a License Key
Next I did a quick google which also turned up little to no information, challenge accepted!!
In this post we will take a look at the steps involved, my focus and testing has been isolated to the vSAN License. Time permitting I plan to look at other areas such as NSX-T Data Center and Tanzu.
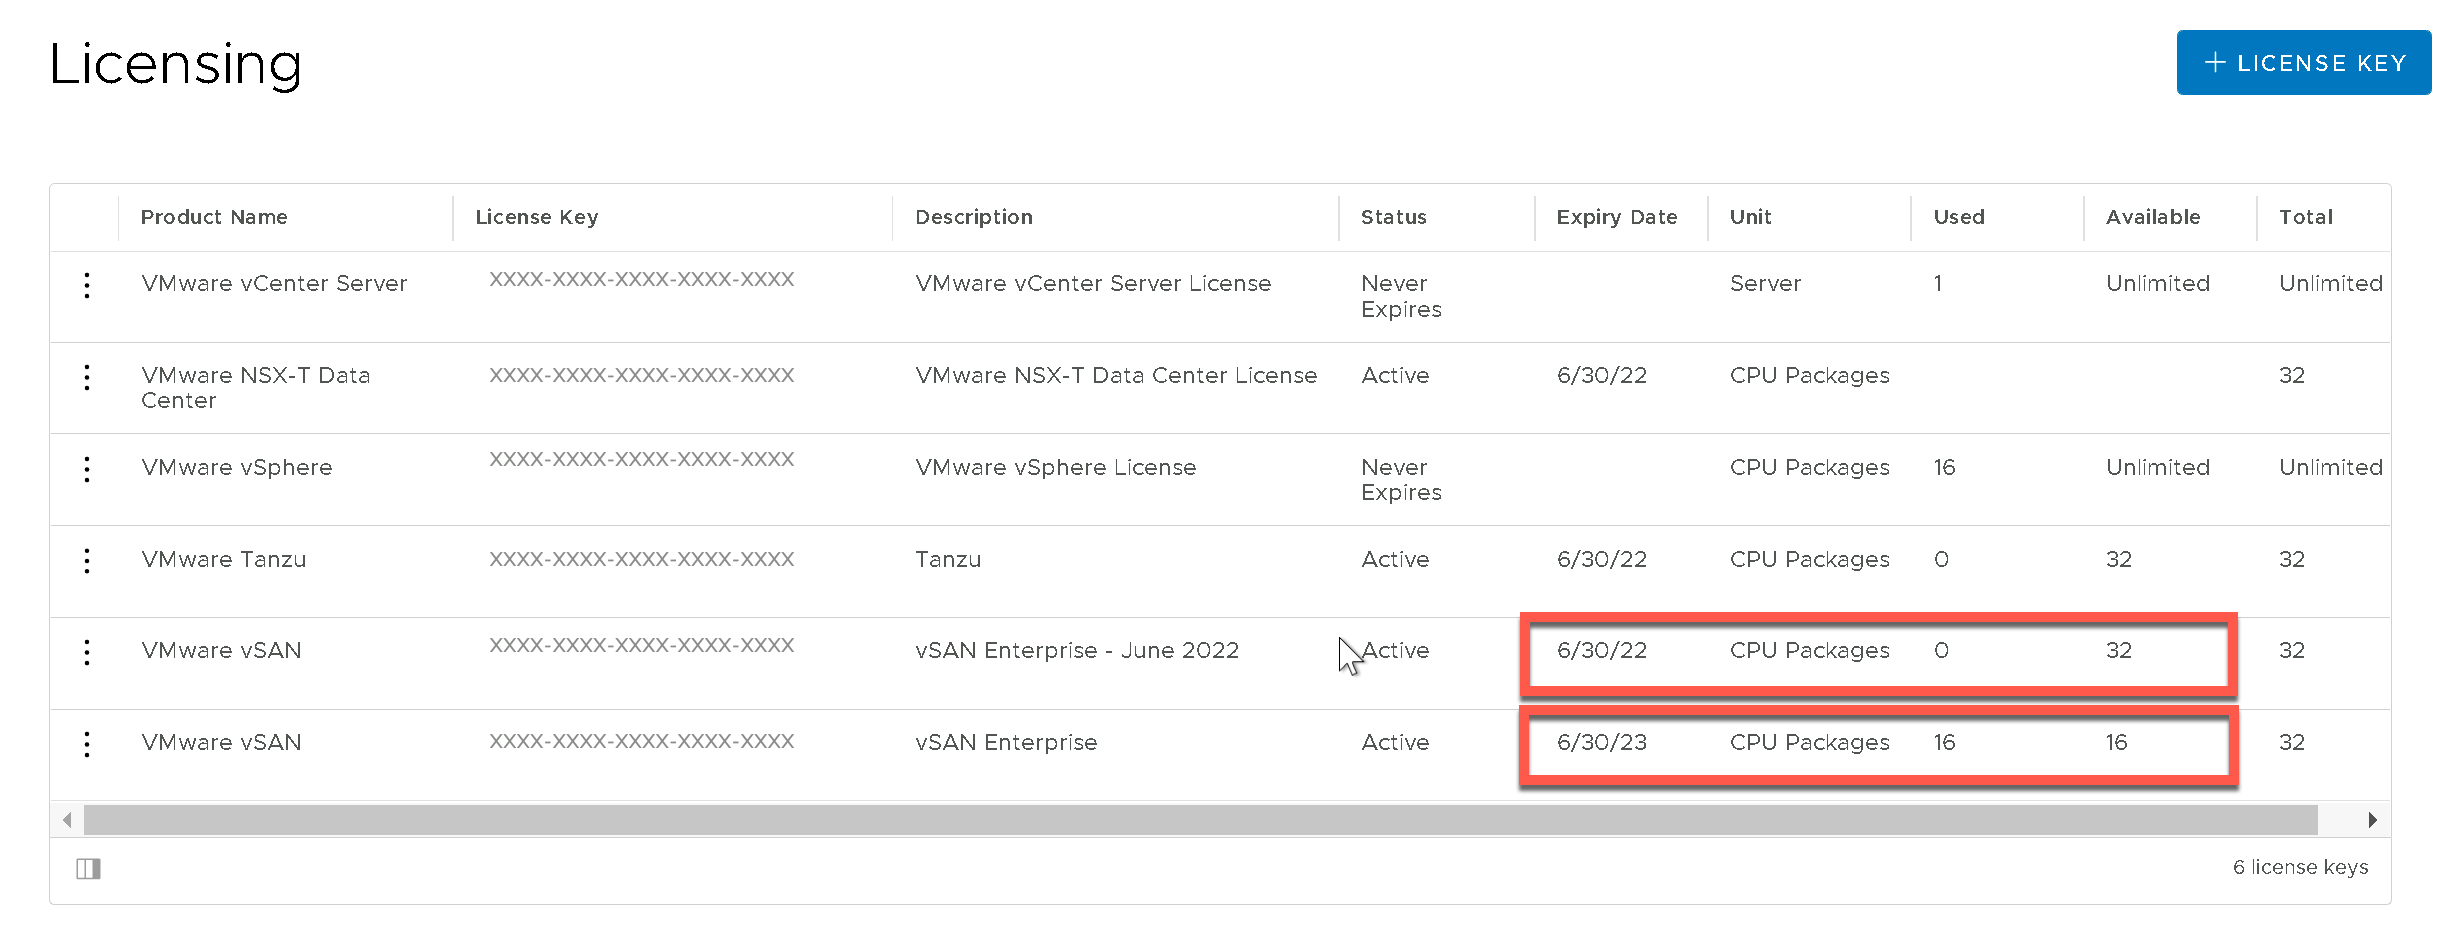
First thing to call out here is that unfortunately the process is not automated from an SDDC Manager perspective, the only thing that SDDC Manager does do is automatically updates the assignment in its inventory once the new licenses are added to both vCenter Server and SDDC Manager.
So lets take a look at the detailed steps, from a high-level the process is as follows:
- Identify the Expiring vSAN License
- Adding a New vSAN License to SDDC Manager
- Adding a New vSAN License to vCenter Server
- Reassign the vSAN License in vCenter Server
- Remove the Expiring vSAN License from vCenter Server
- Remove the Expiring vSAN License from SDDC Manager
Identify the Expiring vSAN License
- Login to SDDC Manager UI.
- From the navigation, expand Administration and select Licensing.
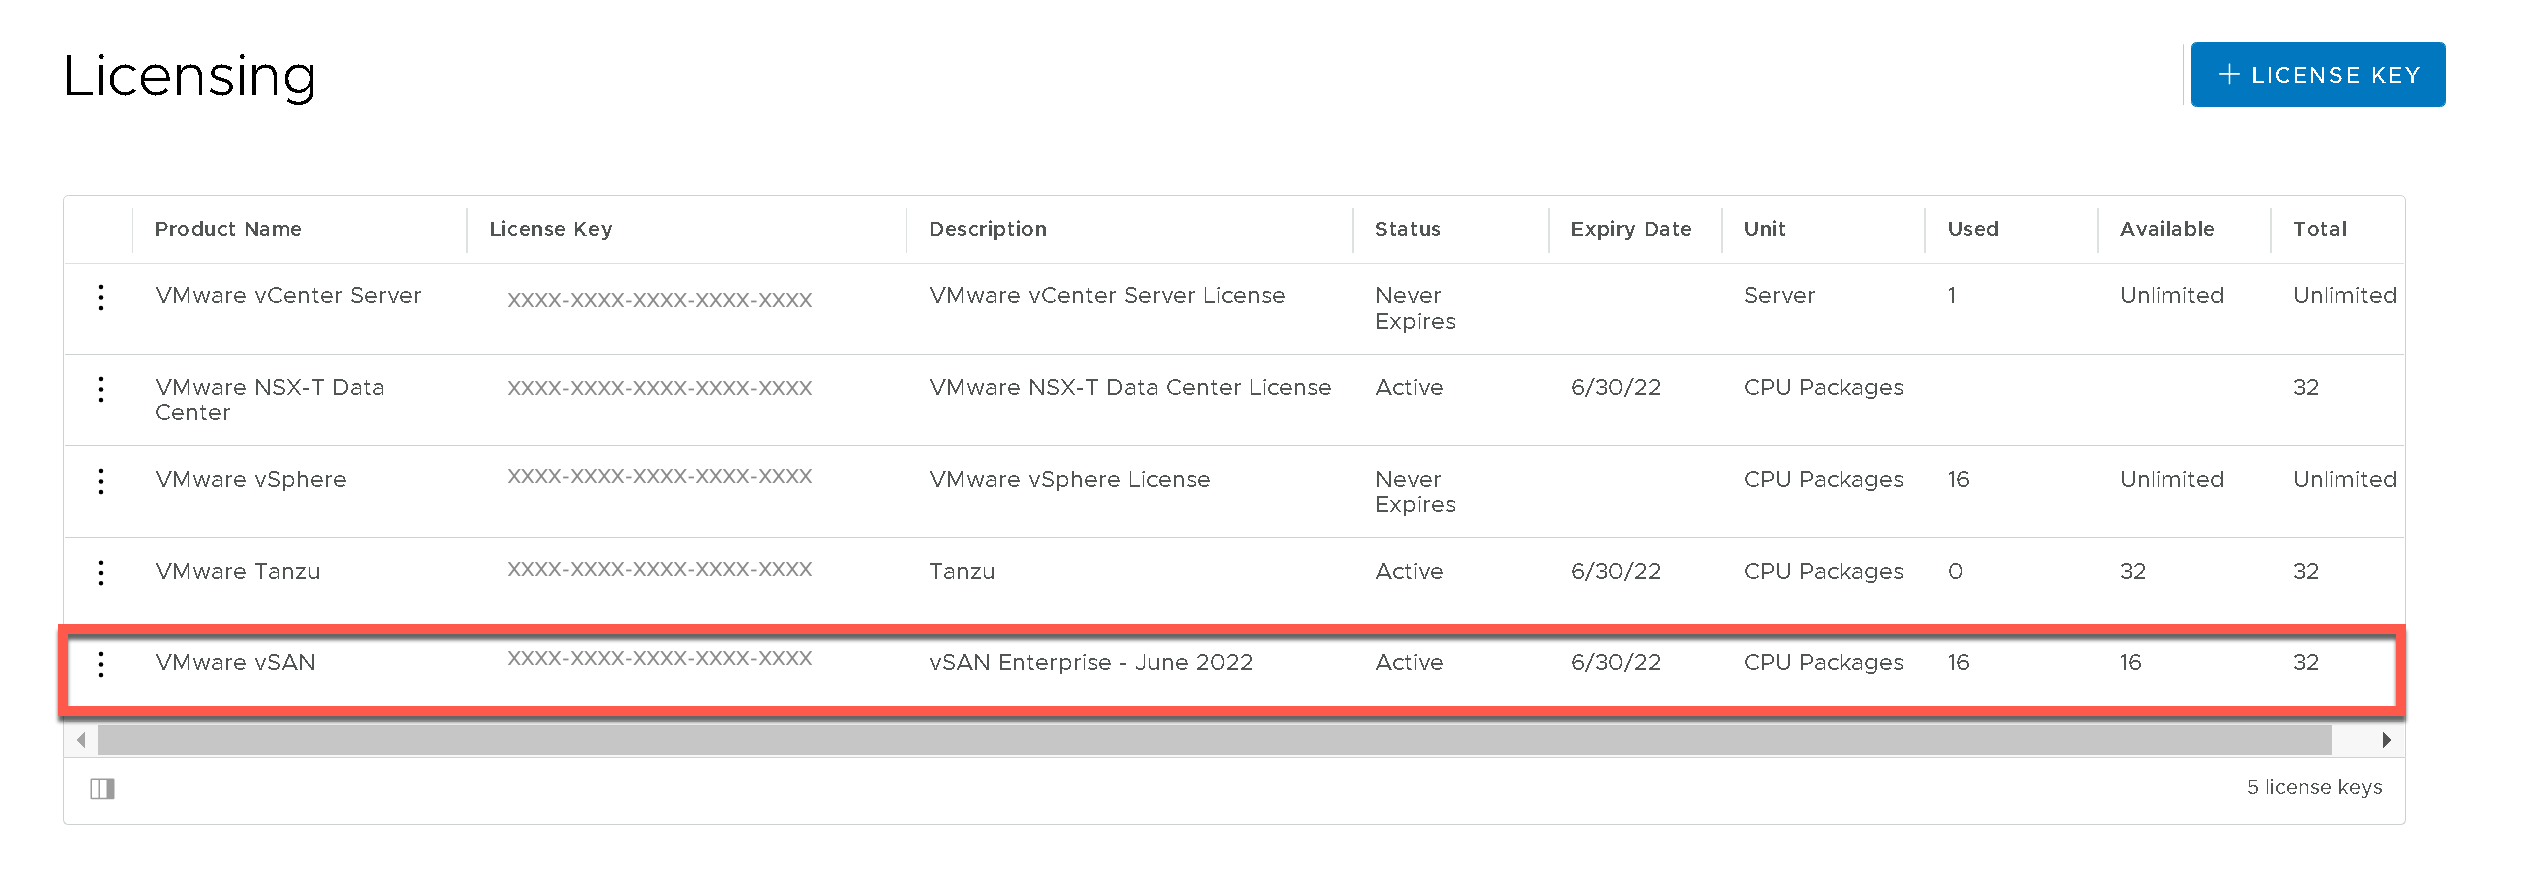
- Identity the license that is expiring and make a note of the license key, and the current used allocation.

Adding a New vSAN License to SDDC Manager
- Login into the SDDC Manager UI.
- From the navigation, expand Administration and select Licensing.
- Click the + License Key button.
- On the Add License Key dialog, using the Product Name dropdown select VMware vSAN.
- In the License Key text box, enter the new license key.
- In the Description text box, enter a description for the key.
- Click Add.
Adding a New vSAN License to vCenter Server
- Login into the Management Domain vCenter Server.
- From the Home menu, select Administration.
- Under Licensing, select Licenses.
- Select the License tab, click Add.
- On the Enter License Keys dialog, enter the new license key and click Next.
- On the Edit license names dialog, enter a license name and click Next.
- On the Ready to Complete dialog, click Finish.
Reassign the vSAN License in vCenter Server
- Login into the Management Domain vCenter Server.
- From the Home menu, select Administration.
- Under Licensing, select Licenses.
- Select the Assets tab, and click vSAN Clusters.
- Select the cluster you want to reassign the license for and click Assign License.
- On the Assign License dialog, select te new license key and click OK.
Remove the Expiring vSAN License from vCenter Server
- Login into the Management Domain vCenter Server.
- From the Home menu, select Administration.
- Under Licensing, select Licenses.
- Select the License tab.
- Select the expiring license and click Remove.
Remove the Expiring vSAN License from SDDC Manager
- Login into the SDDC Manager UI.
- From the navigation, expand Administration and select Licensing.
- Verify that the old license now has a used count of zero and the new licenses used count has gone up.

- Click the ellipses next to the expired license and select Remove.
- On the Remove license key dialog, click Remove.
That's it, you have now successfully replaced and cleaned up the the expiring vSAN license.